3D Metrology Systems Builder Chooses FANUC Industrial Controls to Power New 5-axis Metrology Center
December 7, 2020
For many machined parts, having the specified surface finish is key in meeting the demand of either a particular application or customer. Whether the desired surface is due to cosmetic, resistance or critical use reasons, certain parts demand an exact and reliable surface measurement.
One method of taking an industrial surface measurement is through a physical, invasive practice usually using a stylus. However, for parts that use material easily damaged by any physical touch, this choice is not an option.
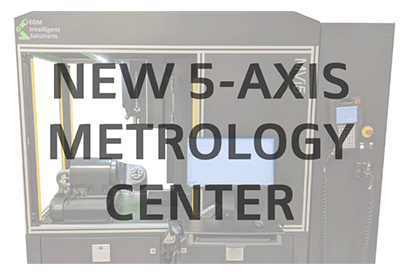
EDM Intelligent Solutions’ (EDMIS) customers needed an improved non-contact inspection system that would have greater functionality and increased ease of use. To meet this need, EDMIS developed a 5-axis automated 3D metrology center, the MVi5, which uses non-contact sensors to capture measurements and determine surface finish in the specified Ra, or the measurement of the surface’s average absolute deviation from its mean height. Additional surface finish metrics like Rq, Rt, Rz, Rmax and Sa parameters are also available.
When a workpiece is loaded into the MVi5, the system captures 3D point data of the part and generates automated form, roughness and dimensional measurements. The part’s datums are also captured and used to produce measurements in the part coordinate system which allows for 3D and 2D true position measurements of the part. Advanced 3D metrology sensors featuring measurement speeds of up to ≤ 1.7 million points per second and high-resolutions of 10nm allow the MVi5 to measure form, distance, height, surface roughness, true position, scan vs. CAD model differences and scan vs. scan differences all in one rugged multi-sensor platform that is ready to be installed directly on the manufacturing production floor.
Using the EDMISi measurement programming environment, customized 3D model-based measurement and inspection programs are automatically generated off the 3D solid model design of the part to be inspected, simplifying traditionally complex programming of measurement and inspection tasks. Offline measurement and inspection programming is also offered through integration with various CAD/CAM software packages common within industry.
Metrology equipment typically uses PC-based controls to inspect and measure manufactured parts. However, because industrial applications, such as in aerospace, defense and medical device manufacturing, increasingly demand very precise assessments that are critical to their end use, EDM Intelligent Solutions decided that their robust 3D metrology machine needed a more reliable control. The company decided to use FANUC CNC controls due to their well-known industry leading 50 year plus MTBF.
“While CNCs may require a more complex machine design, FANUC controls offer less downtime, more efficient production and greater support for processes down the line.,” says Walter Zic, COO of EDM Intelligent Solutions. “We made the choice to use FANUC controls because we know that they will effectively deliver reliable and precise motion control that will always be supported by FANUC.”
EDMIS was familiar with FANUC because the company had already incorporated 6-axis FANUC robot arms for its robotic measurement system, the RSH-M10. Their end users were already comfortable with using the FANUC robot interface and FANUC’s Power Motion i-MODEL A controls have a very similar look and feel.
“We wanted the metrology center to be very easy to operate,” says Zic. Indeed, operation of the MVi5 5-Axis 3D Metrology Center is quick and simple via the touch screen optimized EDMISi human machine interface with native barcode compatibility.
In addition, FANUC’s Power Motion i-MODEL A has a broad range of customizable solutions, including integrated LCD screens and sophisticated handheld displays that are ideal for even novice operators. Zic was also concerned about his customers having to regularly update a PC-based type of control, which is not a problem with CNCs.
Another feature that sets the MVi5 apart from other metrology systems is its ability to be located directly on the production floor. Most metrology and surface measurement equipment need to be placed in a separate temperature controller clean area away from production machinery. The MVi5, on the other hand, is not as temperature sensitive as other metrology systems. The industrial machine tool base houses a top of the line motion system with linear travels of 300mm on the X, Y and Z axes along with integrated glass scales on each. The heavy-duty rotation and tilt unit features a payload of 20kg with a B-Axis tilt range of +/-120° and continuous C-Axis rotation of 360°, with both axes having integrated absolute encoders.
FANUC provided technical assistance to ensure the controls selected would deliver the performance needed for precise and repeatable measurements. Now, the new MVi5 is shipping to customers, such as those in the aerospace industry. Customers are using the 3D metrology center to measure parts used in new generation aircraft that reduce their fuel consumption by 15 percent or more. To accomplish this, these parts must have precisely shaped features, edges and surface finished to help boost the efficiency of the propulsion systems and control components onboard the aircraft.
“Industrial form and surface measurements require precision, reliability and repeatability,” says Zic. “It’s critical to operations. We knew FANUC would offer the reliable motion control crucial for measuring parts used in industries like aerospace, defense and medical device manufacturing.”


